Placing Products on Sale
To place an item on sale, use the Sale Pricing Task. With this powerful tool, you can specify a sale price to run between specific dates, between specific times and on specific days of the week.
Steps to take
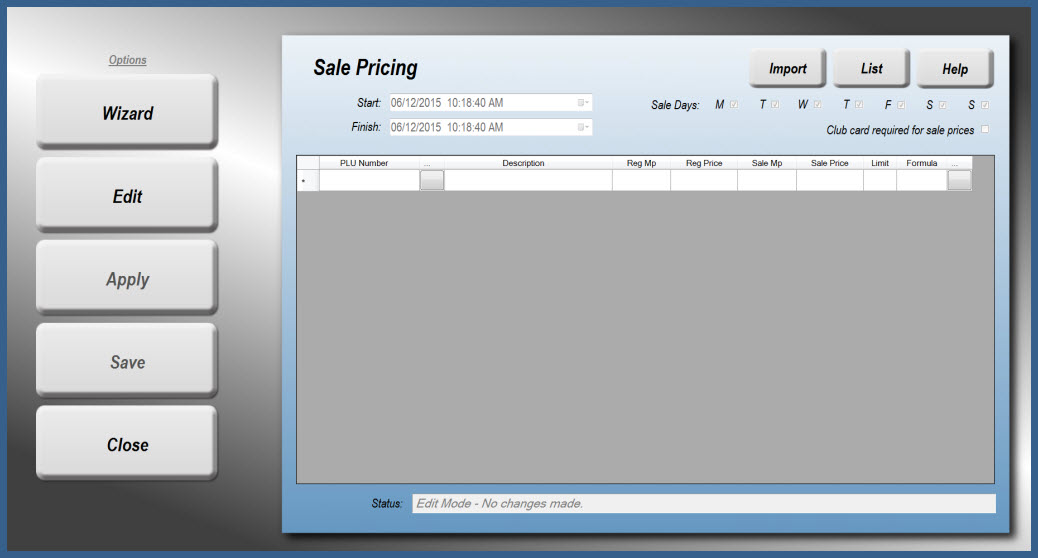
In StoreTender Pro or HQ, navigate from the Main Menu [Tasks] > [Pricing] > [Sale].
At this point, you can use the Wizard or manually add items by pressing [Edit].
Using the Wizard
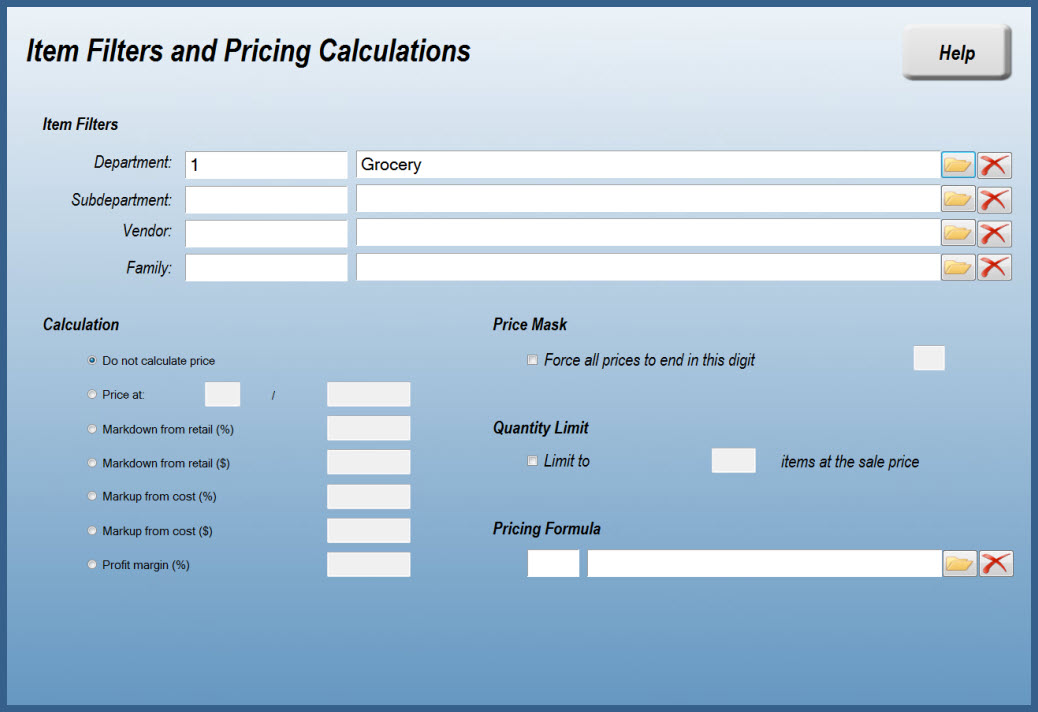
Press [Wizard] to open the selection screen. From here you can filter your Products, set various pricing calculations, mask your prices, limit quantities and/or apply a Price Formula.
Once your choices are complete select [OK] and the filtered list with your configurations (if any) are presented to you.
Using Direct Selection
If you don't want to use the Wizard, that's fine. Simply press [Edit] and begin completing the Sale Pricing form.
Setting Sale Parameters
Select the Start date for your sale. You will also need to select a time for your sale to start. Next, select the Finish date and time for your sale. Finally select the day of the week that the sale should run on.
It is important that you understand the use of the time selection in Sale Pricing. Because of the versatility of this tool, you can select times to be 24 hours a day, or merely during certain times. So, if you want your sale to run all day between the dates, set the start time at 12:00:00 am and the end time at 11:59:59 pm. When an item is sold, the system will check if the current date is within the Start and Finish dates. If it is, the next check is if the current time is within the Start and Finish times. The final check is if the current day of the week matches the day of the week selected.With this flexability, you can set a 2 week sale, that runs only between 11 am and 1 pm, on Monday - Friday only. This example could be used for a "weekday lunchtime special".
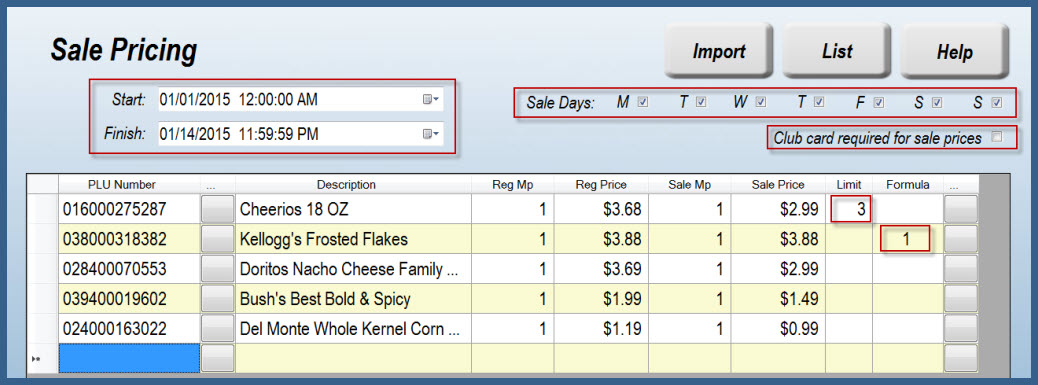
In the below example, the sale runs from January 1 to January 14. On each of those dates, between 12:00:00 am and 11:59:59 pm the sale is valid (an all-day sale). Also, the sale is valid every day of the week. If you wish, you can require that a frequent shopper club card be used for the sale to apply. If you don't have cards, simply select a customer and apply them to the sale. If the customer is in your database they are automatically considered club members.
You can also see that the first item has a limit of 3 items on sale. This means that after 3 are sold in this transaction, no further discount is applied. On the next item the sale price is the same as the regular price, but a Price Formula has been selected. This means that during the sale, the Price Formula will apply. When the sale is over, the formula will no longer be used by that item.
When you've finished making your entries you may either click [Save] to exit and return later or [Apply] to apply the Sale. If you select [Save] followed by [List] you can receive a printed copy of the sale batch for your records.
If you would like to populate the Sale Pricing form from a data file, select [Import]. You can then define the sale parameters from the products populated by the import.
Sales are respected for all stores within the same Price Zone. In a multi-store environment you can create a Sale in HQ, Pro or Back Office. HQ will permit you to work with multiple Price Zones. Pro and Back Office are restricted to the Price Zone that the current location (store number) is a member of.
Removing or Editing a Sale
A Sale cannot be directly edited. To change the terms of a sale, simply apply a new sale for the same product.
In Pro or Back Office, you can see if an item is on Sale by loading the Products screen for that item. Navigate to [Data] > [Inventory] > [Products] and press [Find]. Once you've selected your Product, if the item is on Sale you will see a red box in the Price Zone area. This box lists the dates the Product is on sale, along with the Sale price. To remove the Sale from the Product, press [Edit] and click the red 'X' that appears next to the red box. Press [Save] and your changes will be applied.
In HQ you will see the Sale checkbox and Sale Price fields in the Price Zone area. If the box is checked, the Product is on Sale. If you press [Edit] and uncheck the box the Sale will be removed. Click [Save] to apply your changes.
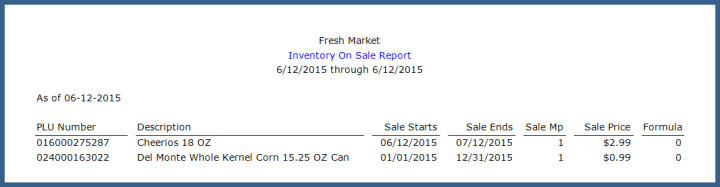
Reports are also available that list all Products on Sale during specific dates. For example, if you wanted a report on all Products on Sale today, navigate to [Reports] > [Inventory] > [Stock] > [On Sale]. Select today's date for Start and End and press [OK]. There are various other filters available for this report.