Titan 2-Line VFD Customer Display Setup
Both the SAM4s Titan-160 and Titan-560 support the use of an optional 2-line Vacuum Fluorescent Display (VFD), attached to the back of the POS Terminal. This display is connected to a powered COM port on the Terminal.
The COM port that the VFD connects to has a RJ-45 connection, and looks like the connection end of a network cable.
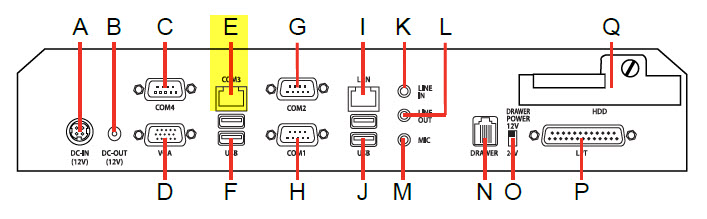
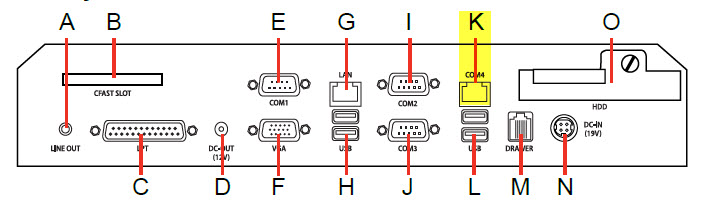
The Titan-160 COM port for use with the VFD is marked as COM3. On the Titan-560, it is COM4.
To connect the VFD you will need to configure the port as a powered COM port, so that the VFD can receive both communications and power through the same port. Below are the necessary steps.
STEP 1: Connect your VFD display
To start, power down your PC. To be safe, make sure the power cord is unplugged from the outlet.
Follow the instructions that came with your VFD to attach it to your terminal stand.
Connect the RJ-45 cable from the VFD to the COM port (COM4 if a Titan-560, COM3 if a Titan-160).
Titan-160
Titan-560
STEP 2: Enter the computer's BIOS
Connect a keyboard to one of the available USB ports.
Power up the computer.
To enter the BIOS setup, repeatedly press the <DEL> or <F2> button. You should also see these instructions flash onscreen, before Windows loads. If the Windows load screen appears, you've missed the opportunity to enter BIOS setup and must start again.
STEP 3: Navigate to COM port settings
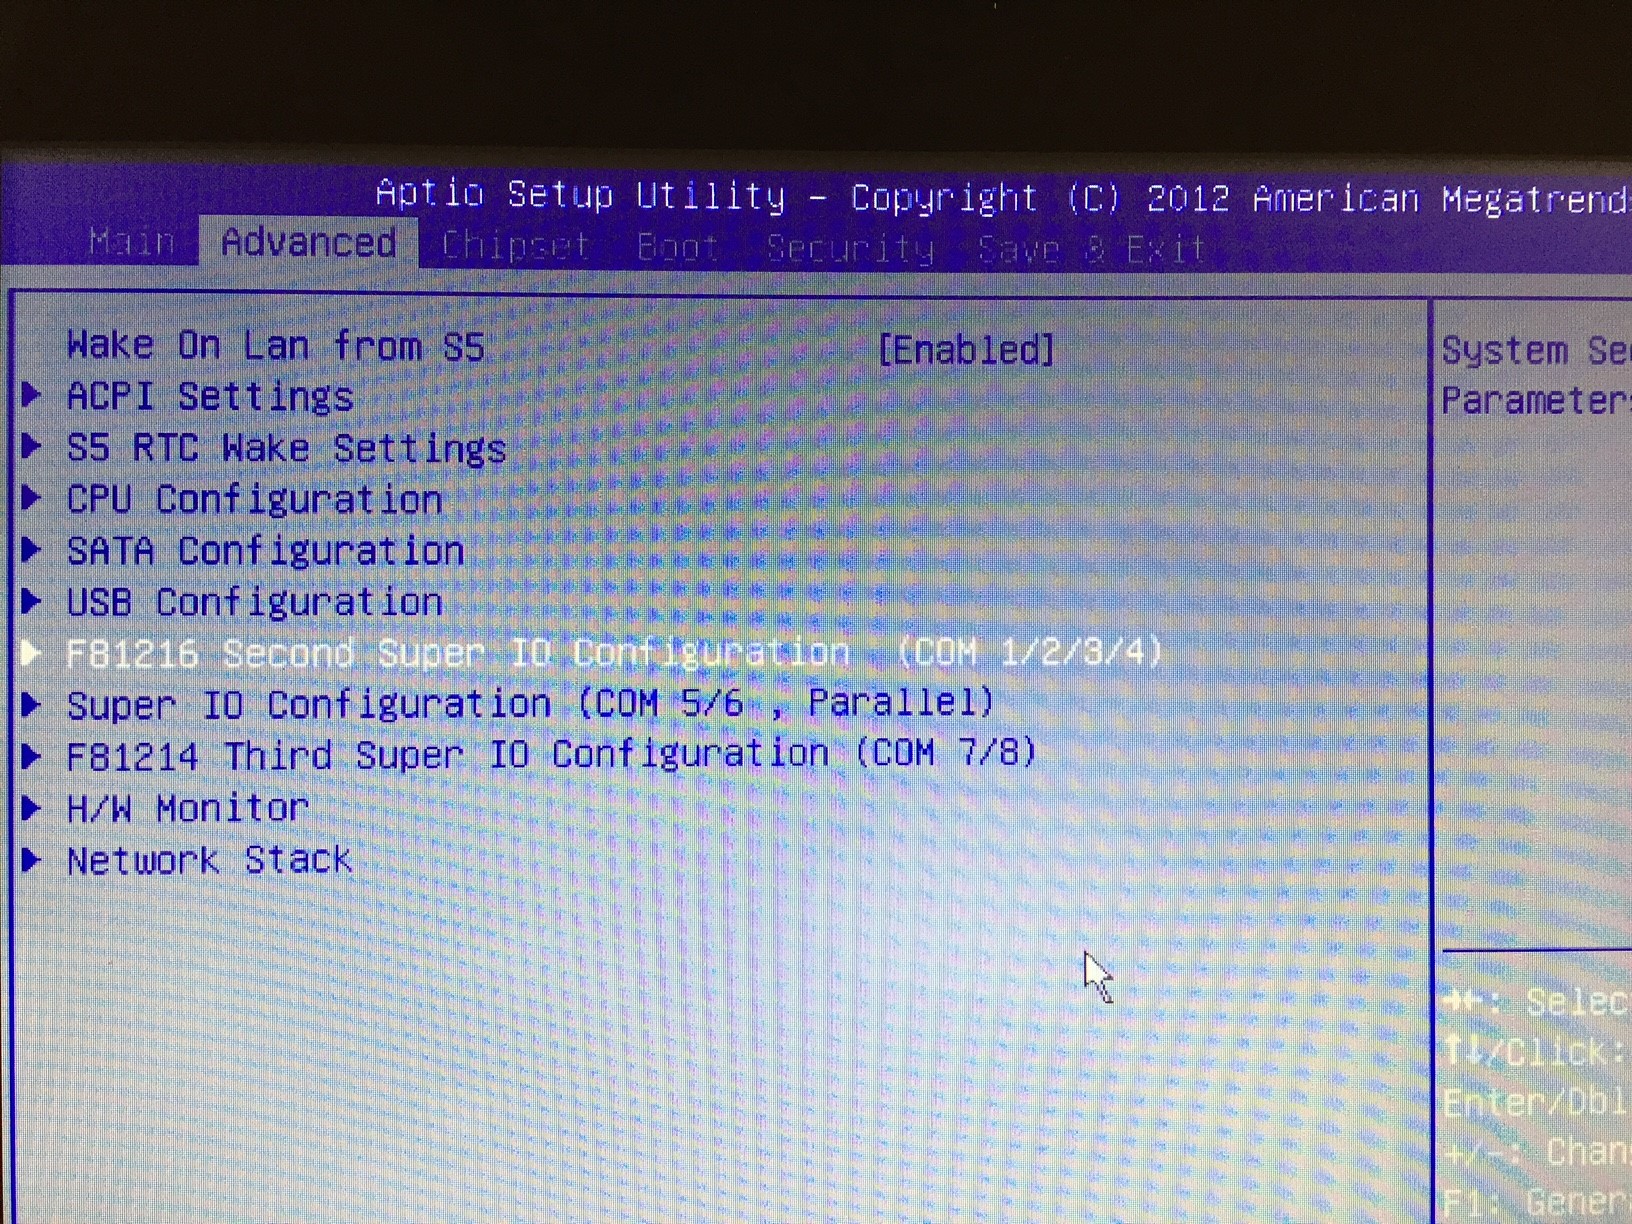
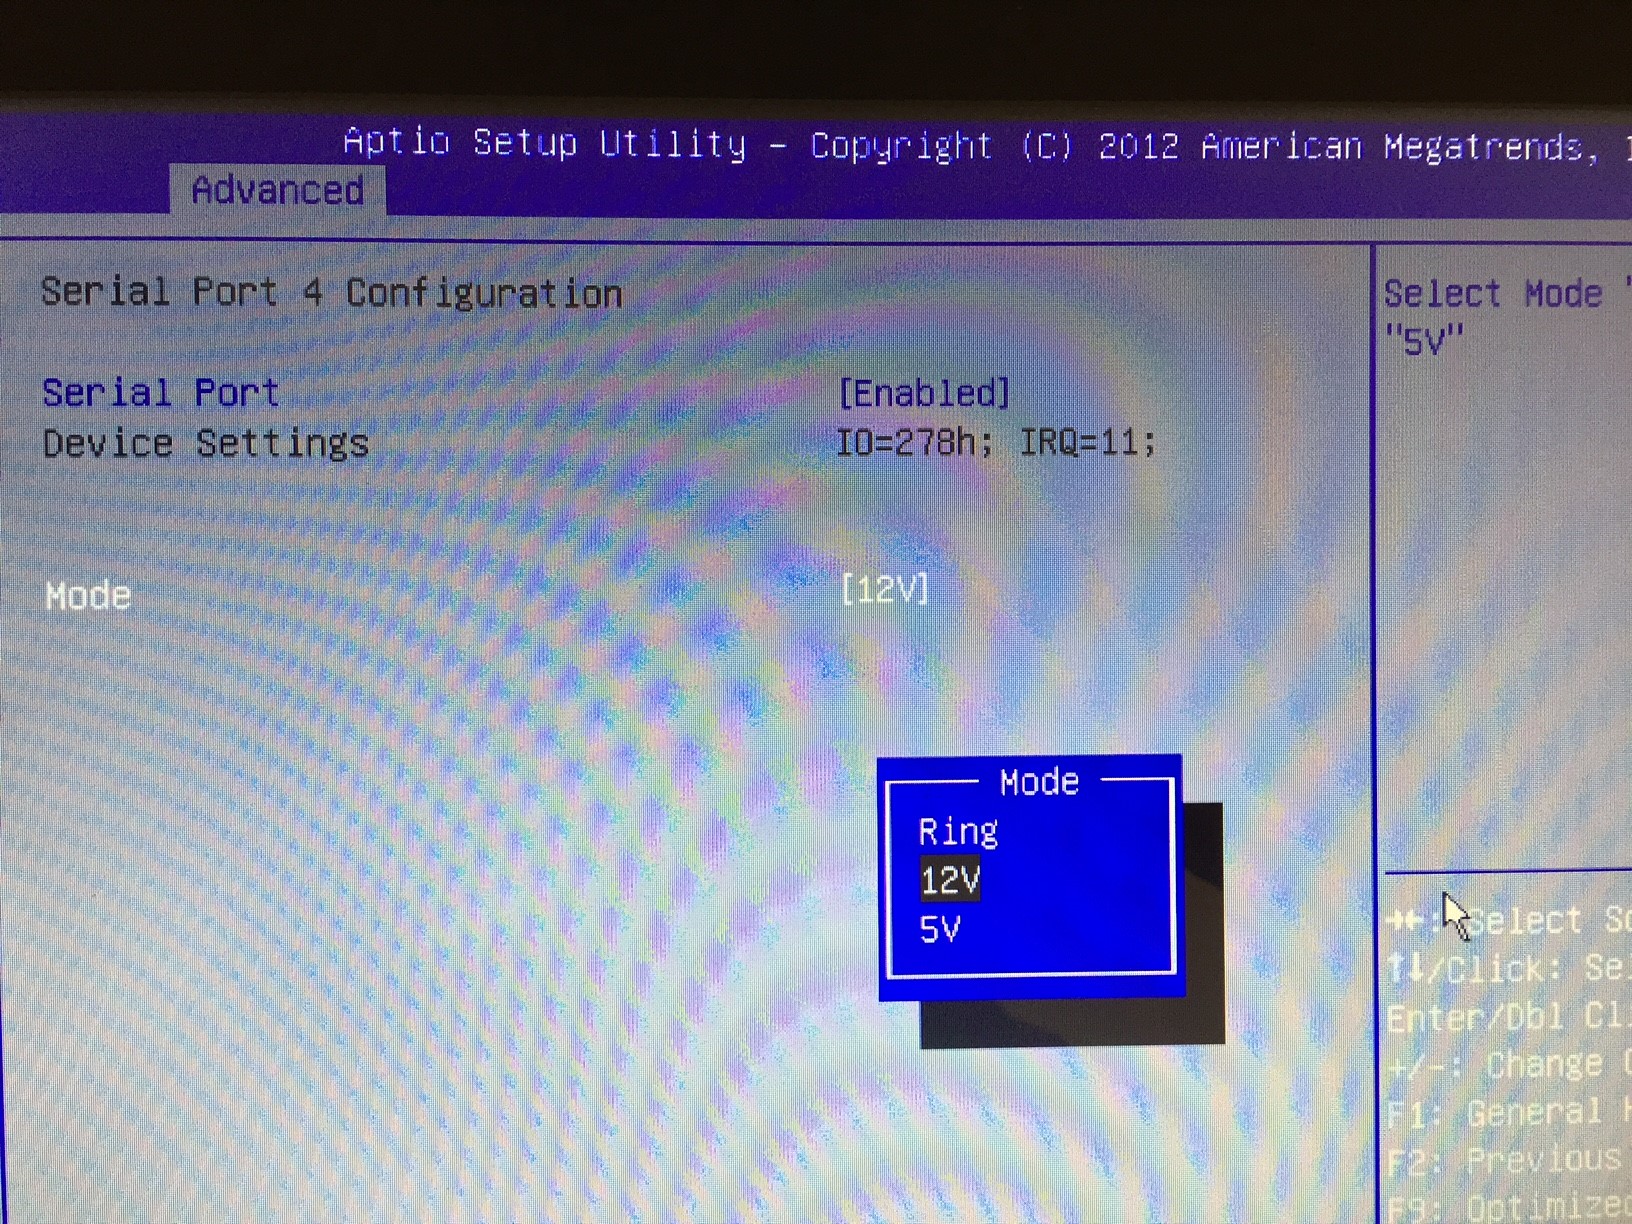
Once you've successfully completed step 2, you will see a blue and grey BIOS screen (above). The first screen will be the MAIN screen, indicated by the highlighted tab at the top.
Using your keyboard's arrow keys, press the RIGHT ARROW key to switch from the MAIN tab to the ADVANCED TAB.
Press the DOWN ARROW key to highlight the "F81216 Second Super IO Configuration (COM 1/2/3/4) option. On the Titan-160 this may look slightly different.
Press ENTER to display your selection.
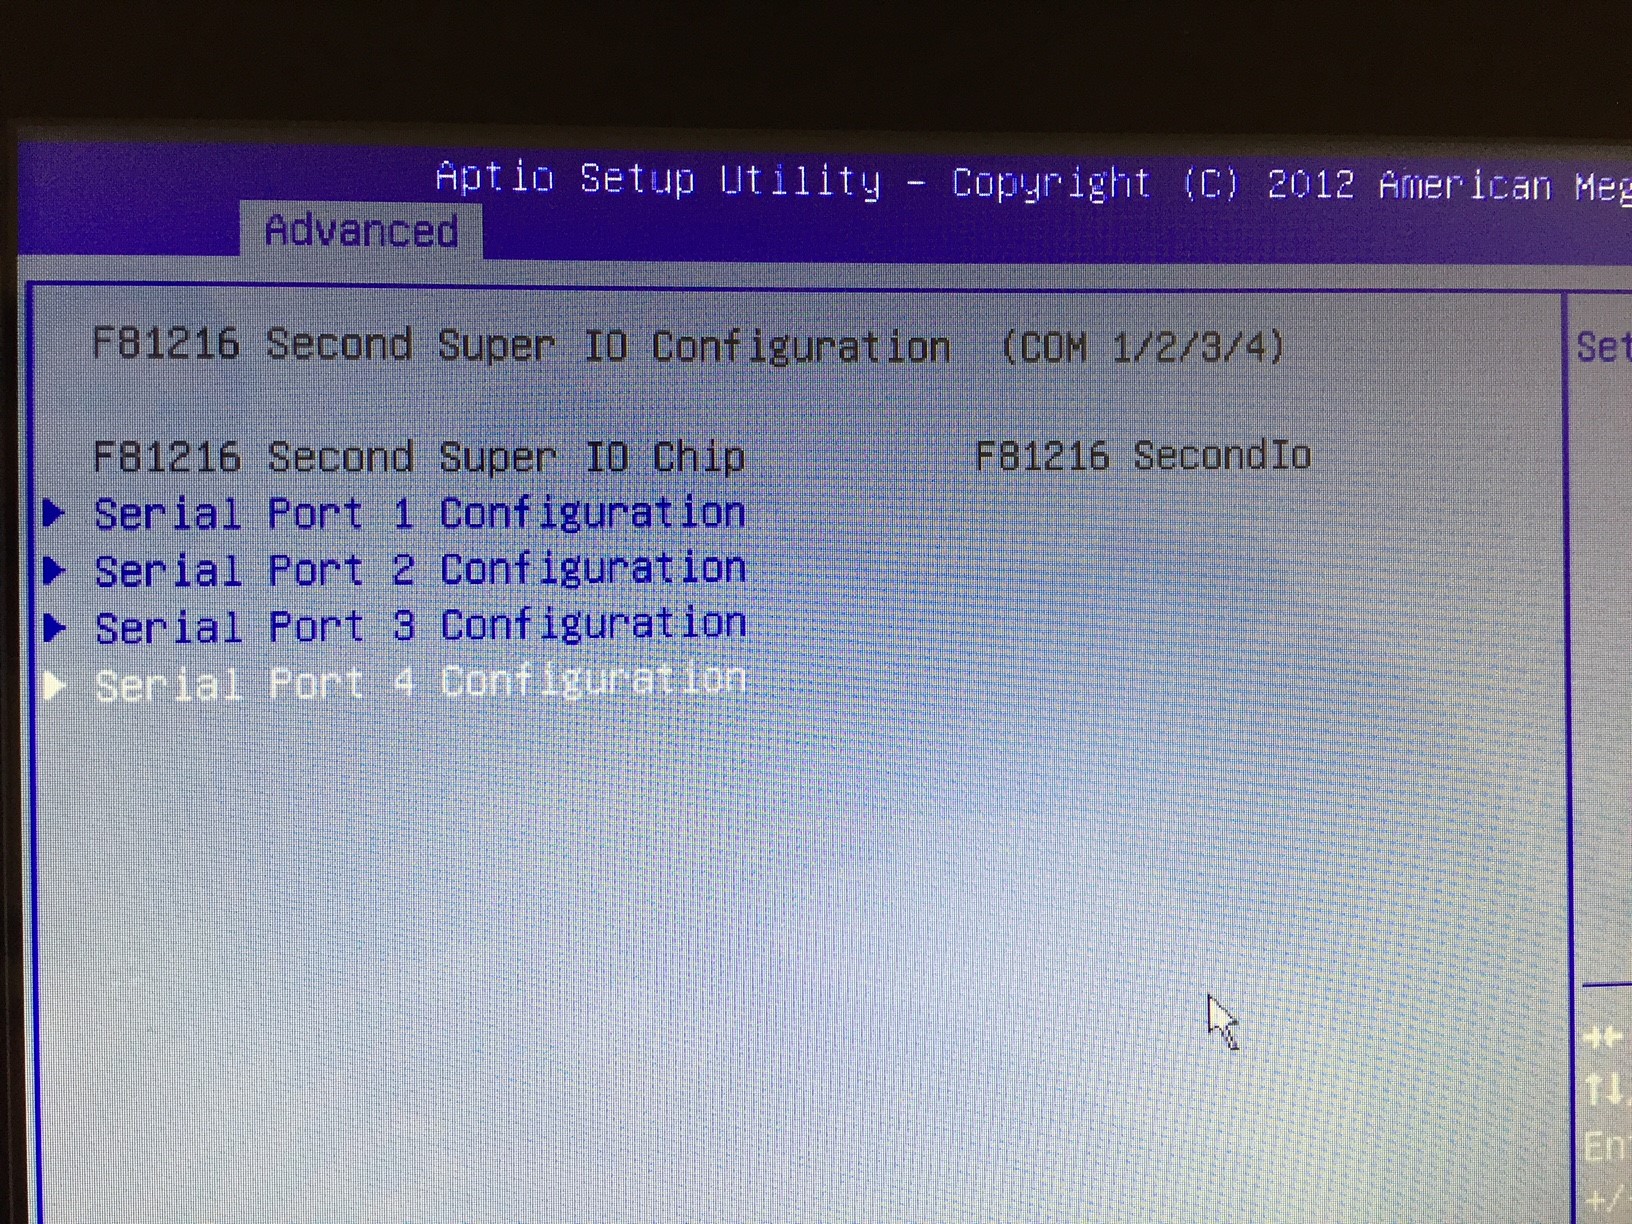
Press the DOWN arrow to highlight the "Serial Port 4 Configuration" menu option. On the Titan-160, you want to select the option for "Serial Port 3 Configuration".
Press the Enter button select the next configuration screen.
Make sure that the serial port you are working with is set to "Enabled". If not, navigate to that option, press ENTER and select ENABLED.
Use your DOWN ARROW and ENTER to select "MODE".
In the pop-up box, use the ARROW and ENTER keys to select "12V". This is the setting that adds power to the selected COM port.
Step 4: Save and Reboot
Once you've completed Step 3, press the <F10> to save your settings and exit. On the confirmation box, select "Yes".
Your PC will now reboot. Once restarted your VFD display will now have power.
Step 5: Configure the VFD in StoreTender
Once Windows has finished loading, enter StoreTender and (if necessary) log in with credentials that allow you to enter the Setup menu.
Navigate to Main > Setup > Register > Devices > Pole Display
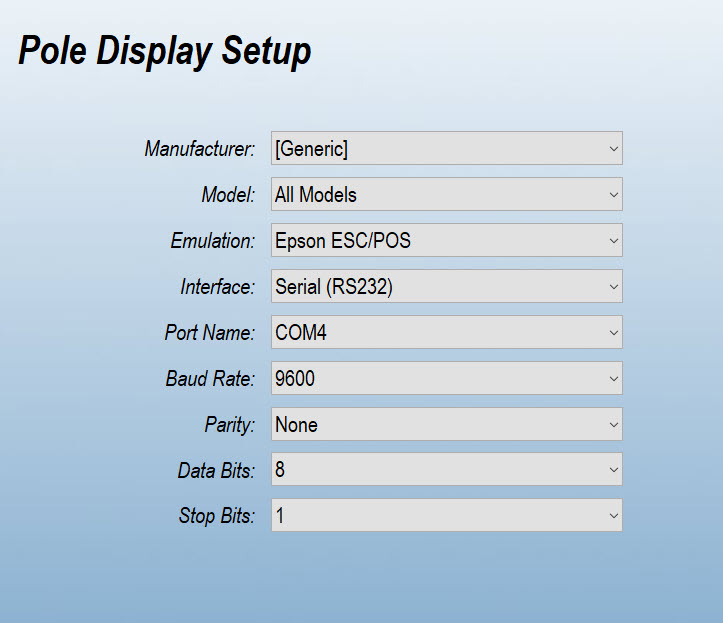
Press Edit and configure your Pole Display as shown below. Select the correct COM port depending on your Titan Model (Titan-560 settings shown)
Press Save to accept your changes. You can press the Test button to cycle through different messages on the VFD to confirm your settings are correct.
Press Close to exit from the Devices setup screen.
Exit and restart StoreTender. Enter the POS to see your VFD in action.