Inventory Upload
- Addon Module -
With the StoreTender Inventory Upload addon module you can send your current inventory data to a variety of online service providers on a regularly scheduled basis. Using FTP (File Transfer Protocol) or SFTP (Secure File Transfer Protocol), your providers will receive Inventory (Products), Department, Subdepartment, Tax Rate and Sale/TPR data for use with online ordering and delivery sites or apps.
This article will show you how to order, configure and use this powerful addon module. Once configured, your providers will receive the data without any intervention from you. No longer will you need to manually export your inventory data and send files to service providers - it's all done in the background for you. Changes you make to Products, Departments, Subdepartments or Taxes will automatically be sent to your providers.
In order to send the most relevant data to your service providers, only Products with PLU numbers that consist exclusively of numbers will be uploaded. PLU numbers containing letters, characters or spaces will not be sent.
In addition, only Products with activity in the previous 60 days are eligible to be included. Activity includes Product creation, edits, sales, returns, receiving, quantity on hand changes or price changes. If you find that a Product was not included due to inactivity, you can make an edit to it in the Products screen to create current activity, making it eligible to send.
Step 1: Contact your service provider
Before you order or begin using the module, you need to gather information from your service providers. Click this link below to download the technical document and send to your service providers. They will need the document to integrate with StoreTender.
Once they determine that they can integrate with StoreTender using the Inventory Upload method, ask your supplier to provide you with the following information. You will enter the information later in this guide.
- FTP or SFTP Server URL (without ‘ftp://’ or ‘sftp://’)
- If a specific folder is required, include it in the URL. Example: "my.store.com/upload"
- Username
- Password
- Protocol (FTP or SFTP)
Step 2: Order the addon
You can order by clicking the following link: Inventory Upload addon module. Once your order is placed we will configure your service and send you an activation email.
Please note, you only need to order one addon module per store.
Step 3: Select your computer
Once your order has been activated, you will be granted access to the Inventory Upload addon module within your StoreTender Pro or Back Office application. Because you can add several service providers to your list or recipients, you should select a computer that is able to remain powered on. The module will send the data every 30 minutes (on the hour and half-hour) - provided the computer is powered on and running either StoreTender Pro or Back Office. StoreTender can be minimized to the Windows Task Bar, or on the login screen. Whatever state it is in, as long as StoreTender is running your upload will run at the appointed time.
While every StoreTender installation linked to your store will have the ability to send files via the module, you shouldn't need to use more than one. If you have questions about this, feel free to open a support ticket.
Step 4: Access the module
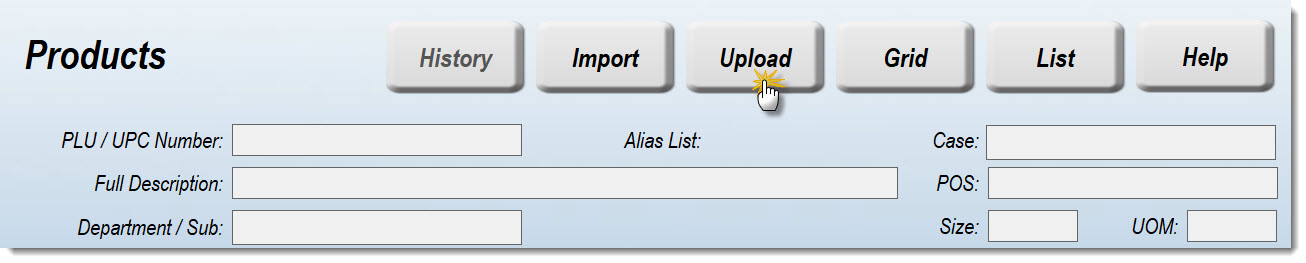
With your module activated and your service provider information in hand, it's time to set up! Navigate to Data > Inventory > Products. At the top of the screen, click the 'Upload' button.
Note: Prior to version 8.5.27 the 'Upload' button was named 'Export' and would allow you to export your data to a CSV file. This functionality has been moved to the Grid under File > Export > CSV.
Step 5: Add your service providers
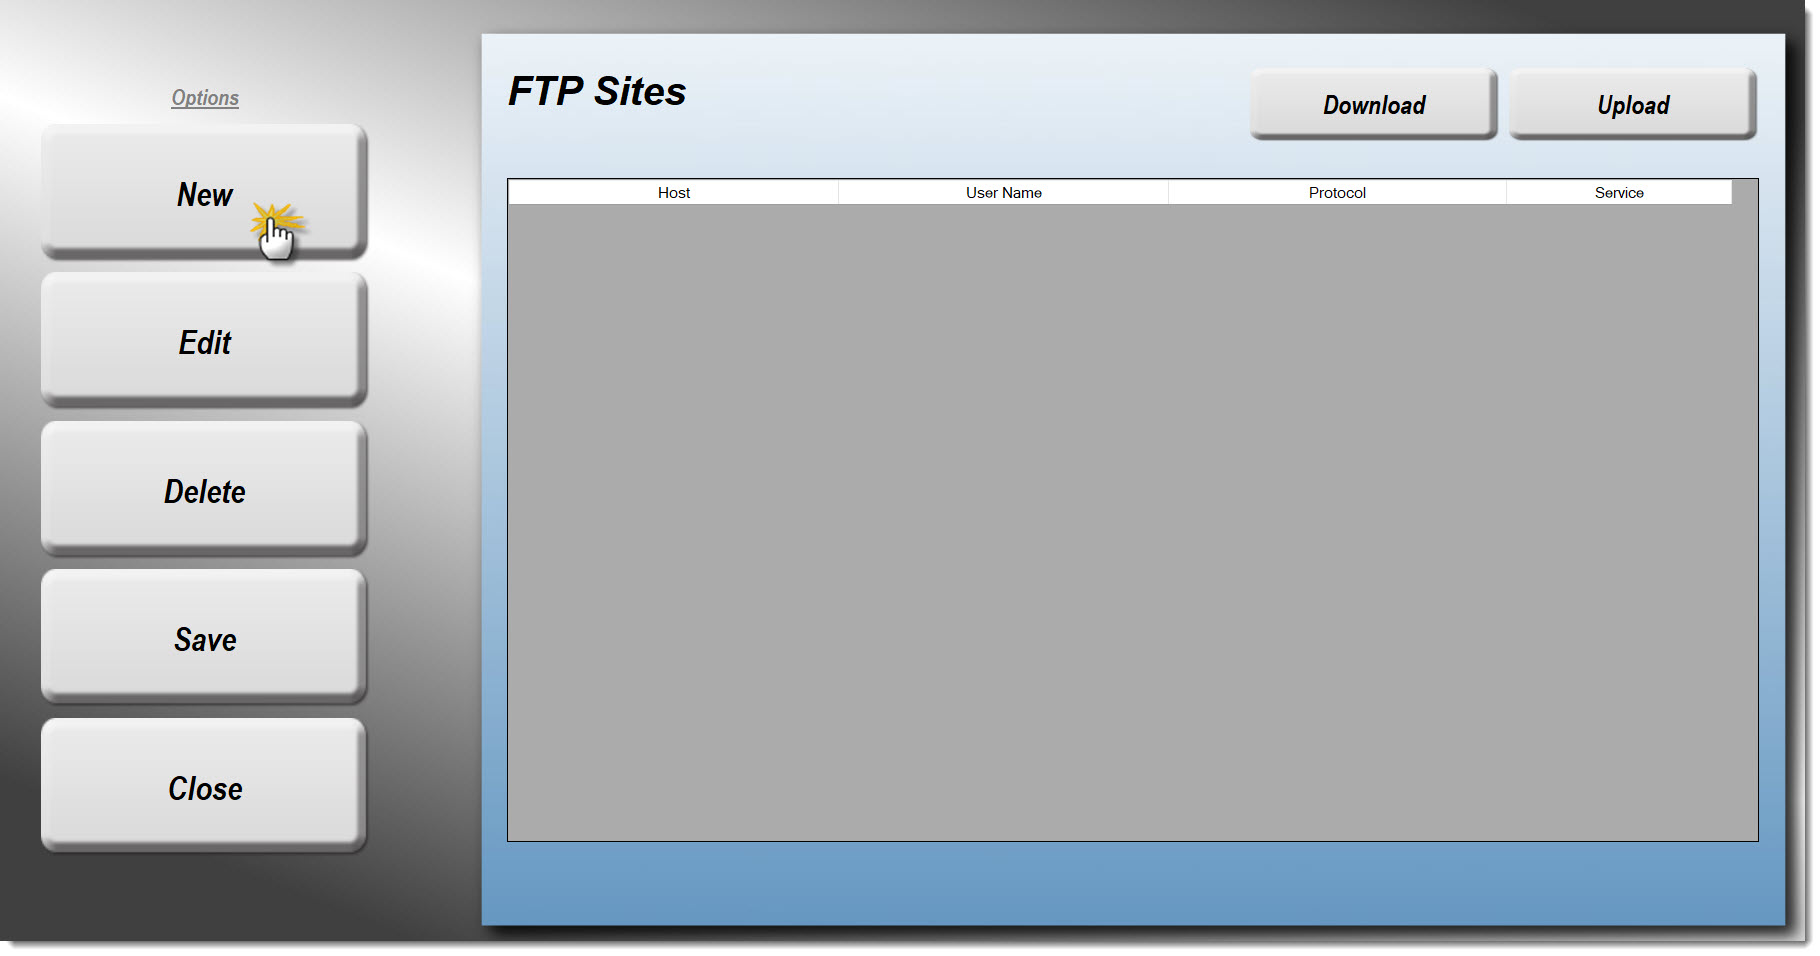
You're now presented with the 'FTP Sites' screen. Click 'New' to add a new provider to the list. You'll be able to add as many providers as you need.
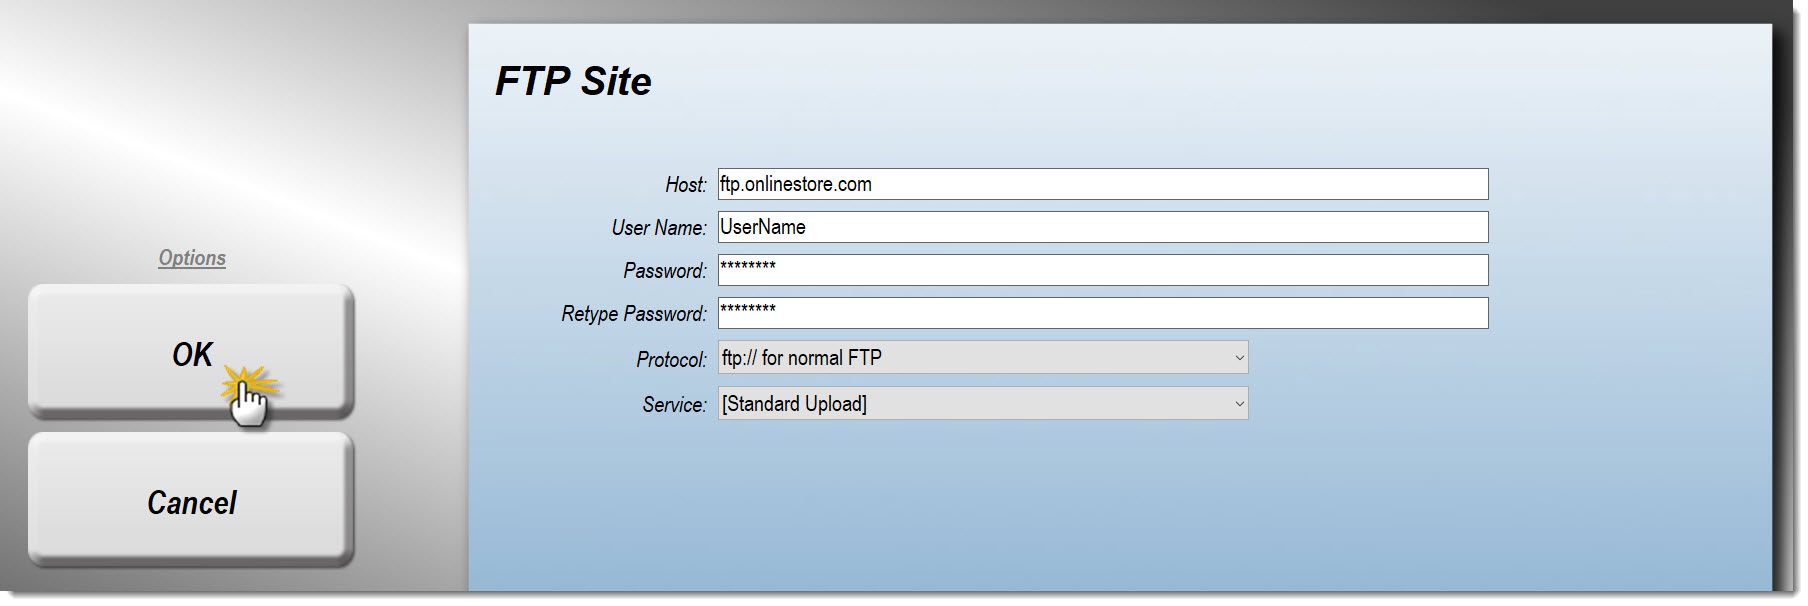
On the 'FTP Site' screen you will enter the provided Host (Server URL), User Name, Password, Protocol (FTP or SFTP). For 'Service', select '[Standard Upload]' from the dropdown menu. Click 'OK' when you're finished. See the example below. Note: FTPS is also listed as a protocol option, but this is not used at this time. You should select only FTP or SFTP.
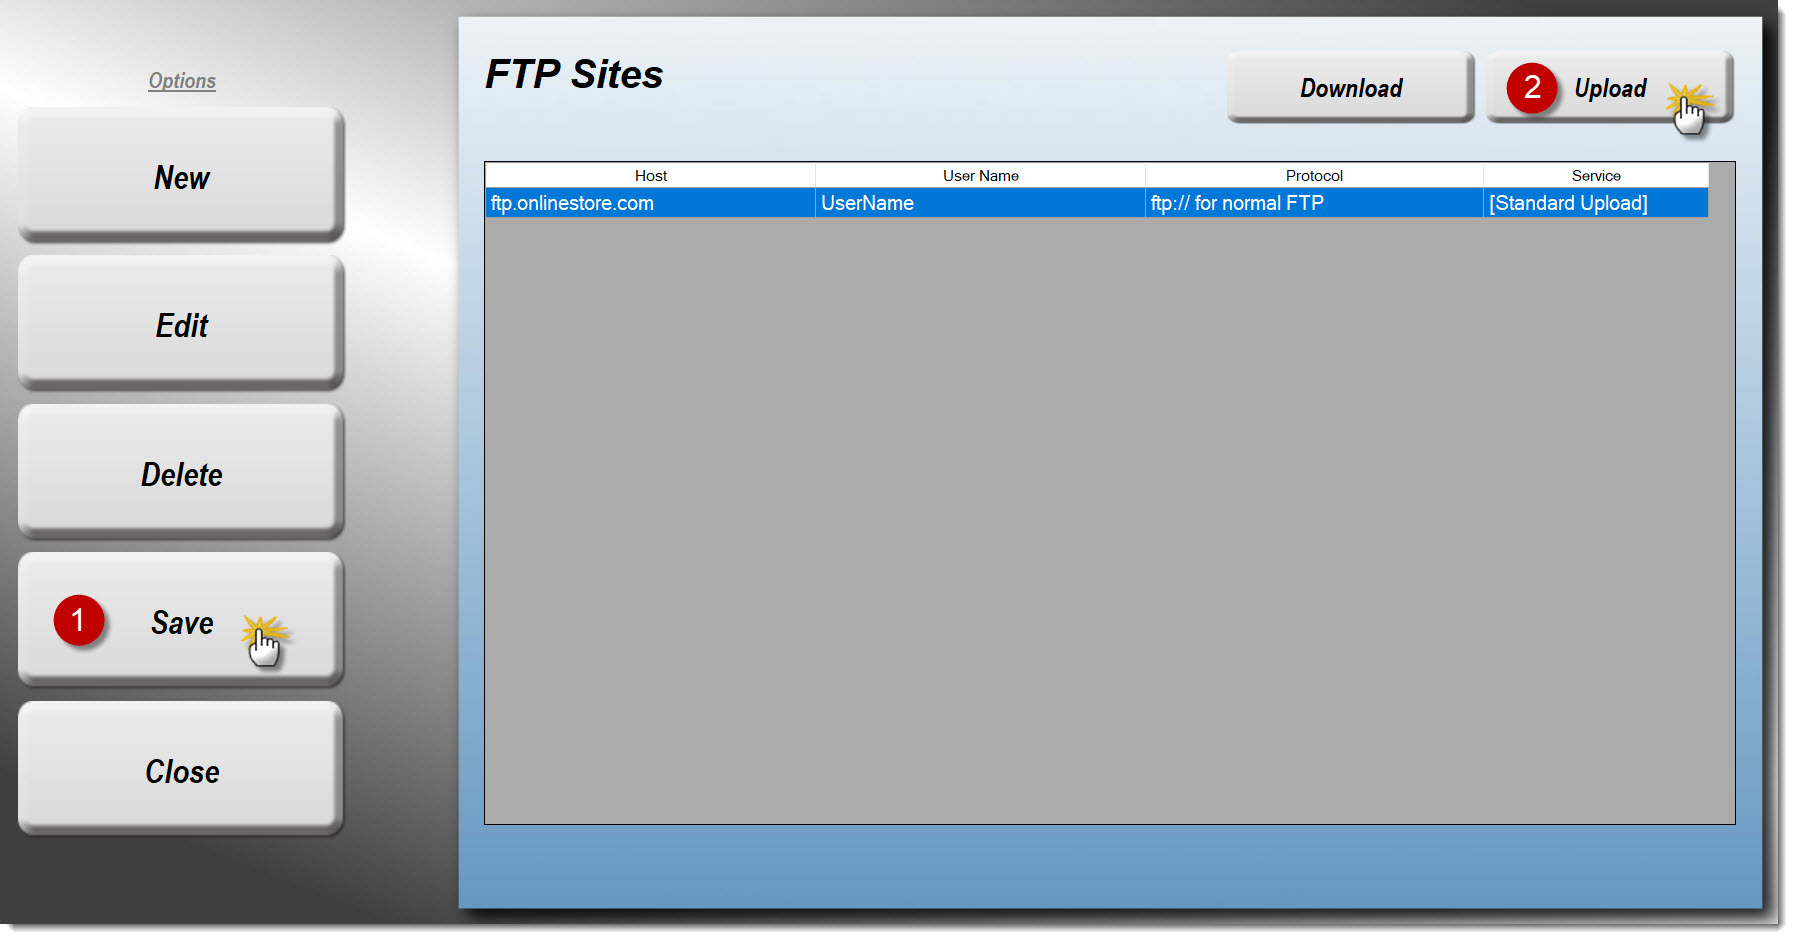
Now that you have entered your service provider, you're ready to save and test your addition. Click 'Save' to save your work.If you wish to send a test file to your provider, click once on the row containing the provider's site, followed by 'Upload'. If you have more than one site in the list, be sure that the one you wish to test is highlighted blue before clicking 'Upload'. Let your provider know you will be sending the test file. They can then confirm receipt.
There is also a 'Download' button, which is reservered for two-way integrations that also track your online orders. If you're interested in a complete online ordering solution with full two-way integration with StoreTender, check out our partner eGrowcery.
We have a special integration just for eGrowcery that will update sales, inventory and taxes for orders placed online. If integrating with eGrowcery, order the eGrowcery Exchange addon module instead, unless you need to upload to other online ordering service providers.
Once the file is successfully sent you'll receive a success message like below. If there is a problem, you'll get an error message with details about the problem. If you get an error, double check that everything is correct (URL, User Name, Password and Protocol).
If you have more sites to add, follow the steps above. Here's what it would look like if you had more than one site.
Step 6: Using the module
Now that you have your sites set up, just keep StoreTender running on the PC. The sites you entered are tied to your license key, so the information and file sends are all triggered by that particular computer. You can minimize StoreTender and keep working on other applications. Or, you can leave StoreTender at the login screen. You can even run the module while in the POS, ringing up sales. The upload will happen in the background, silently.
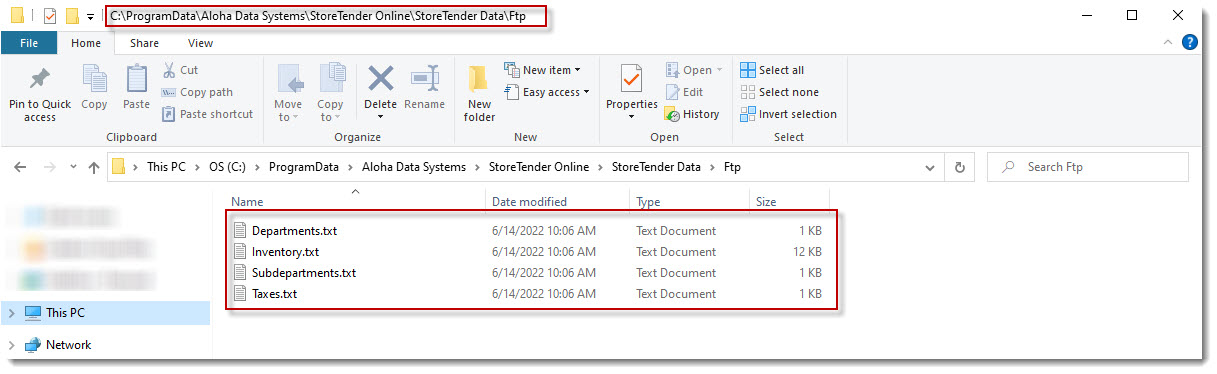
For those who wish to see the files that are created, you can find them in this directory: "C:\ProgramData\Aloha Data Systems\StoreTender Online\StoreTender Data\Ftp". We build the files and store them in this directory before copying to your various service provider sites. We do not recommend moving, deleting or viewing these files from their current location - as it may interfere with sending the files. Instead, you are free to copy them to another location and then open/view. The files are in .txt format because it is safe to open with Windows Notepad. Do not open the file with Microsoft Excel, as Excel will convert certain PLU numbers and other data to an unusable format.
Optional Step 7: Weighed items
If you plan on selling items by weight online, there are likely changes you need to make to your inventory data. Currently there are three ways to sell weighed items in StoreTender:
- Weigh the item using an integrated POS scale.
- Weigh the item on a non-integrated scale and enter the weight manually.
- Weigh the item on a label printing scale, which produces a price-embedded barcode that is scanned at the POS.
The first two options mean the Product is typically set up in StoreTender with the 'Scale' setting being set to '1 - Yes' or 'Yes with Tare...', options 2, 3 or 4. However, items that are weighed and labeled on your label printing scale (typically a deli station), are usually set to '0 - No'.
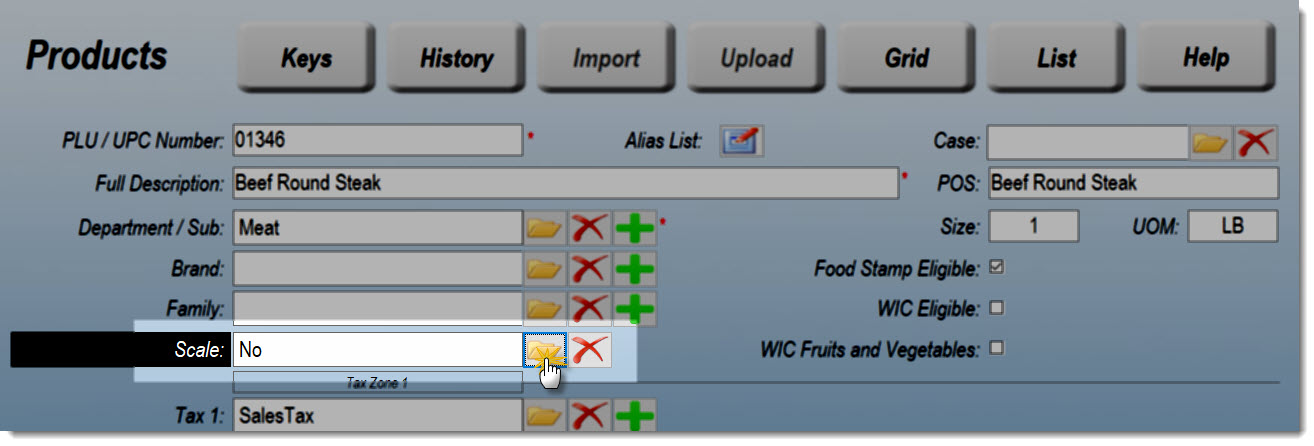
In this case, we need the ability to tell your online ordering service provider that these items are sold by weight. Find the item in Products and click 'Edit'. Next, click the folder icon next to the 'Scale' setting.
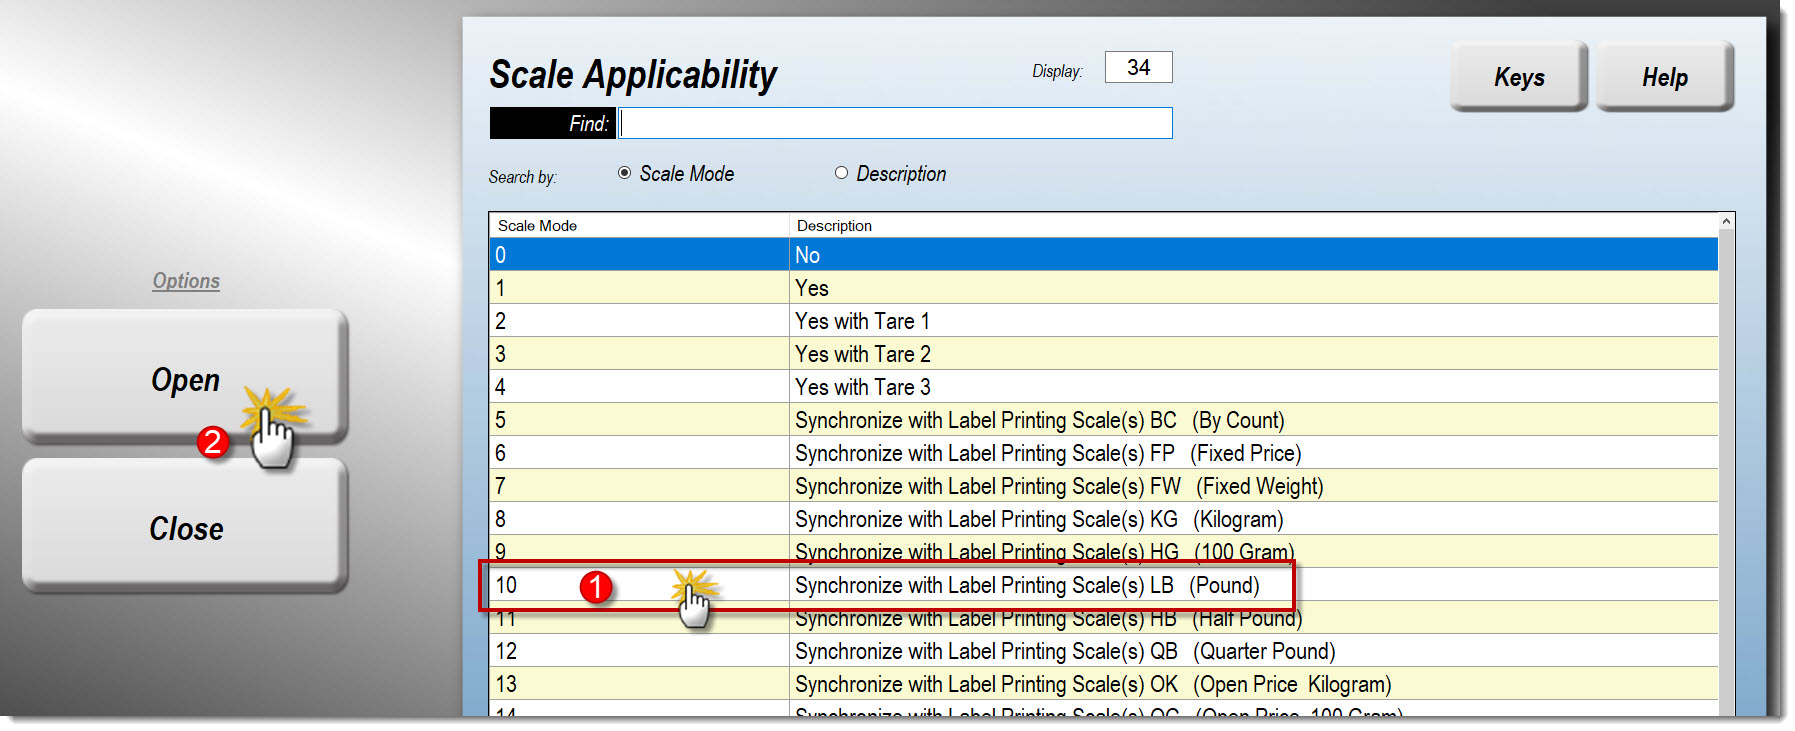
When clicked, the 'Scale Applicability' screen will display. We do not want this item to require weighing at the POS - it is are already weighed and has a price embedded barcode on it. To get the correct weighed item flag for upload, change the setting from '0 - No' to '10 - Synchronize with Label Printing Scales(s) LB (Pound)'.
The settings 5 and greater are used by our customers who integrate their label printing scales to StoreTender using the ePlum Scale Management Software addon. However, without the ePlum addon, nothing will change in your setup other than allowing your online ordering service provider to know this is a weighed item.
Select the option in red (below), followed by the 'Open' button. Click 'Save' on the Products screen to save your changes.Optional Step 8: Container Deposits
If you are located in a state that collects container deposits, you likely have several container deposit Products that are added as Linked UPCs to items that require said deposits. In all likelyhood these Linked UPCs reside in the same "Hash" Department, so that you can track your deposits in.
For StoreTender Inventory Upload to know which items have container deposits, you must make sure that these reside in a Department that contains the following words. These must be exactly as listed and are not case sensitive.
StoreTender searches for the above Department name when determining if the Linked UPC is a container deposit. Since the search is whether or not the above words are included in the Department name, the following names would pass:
- CRV
- C.R.V.
- Bottle Deposit
- Container Deposit
- Can Deposit
However, the below would fail, because they do not contain the aforementioned trigger words:
- CRV Deposit
- Bottle Deposit In
- Deposit
- Bottle Redemption
- Can Refund Deposit
Note: Once StoreTender finds your container department name, it will place the value of the container deposit item in one of the fields in the Inventory.txt output file. This way your service provider will not have to search for the link product. And since it is possible that the container deposit PLU you use is not strictly numerical (numbers only), that PLU would be omitted from the file.
Reference Documents