Charging Check Cashing Fees
StoreTender supports the calculation and tracking of check cashing fees that you can collect when cashing checks for your customers.
To use this function, follow the tutorial below:
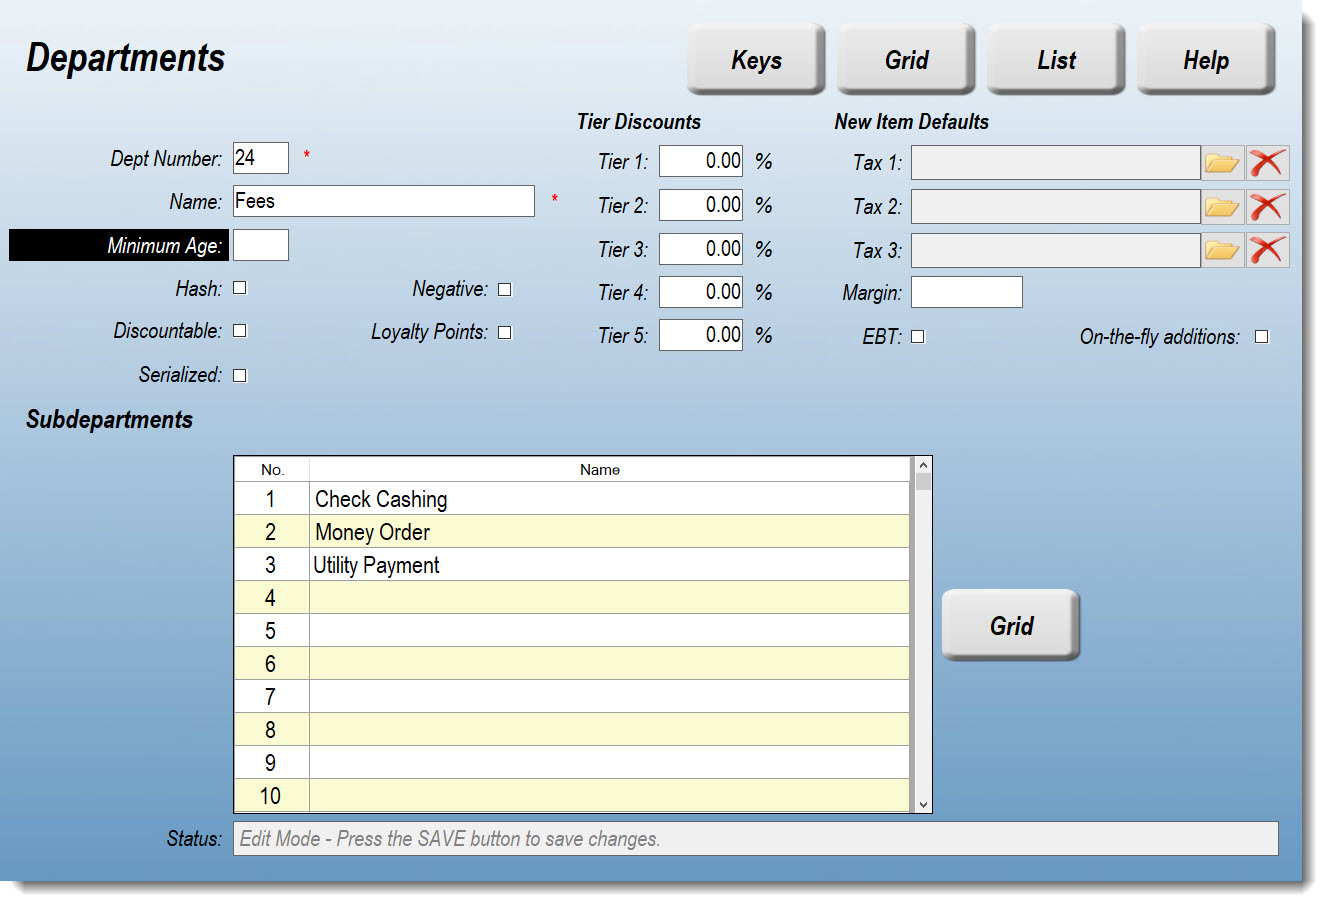
Step 1: Create or Select a Department for your Fees
To track your Fees, you should either create or select a Department for tracking purposes. Below is an example.
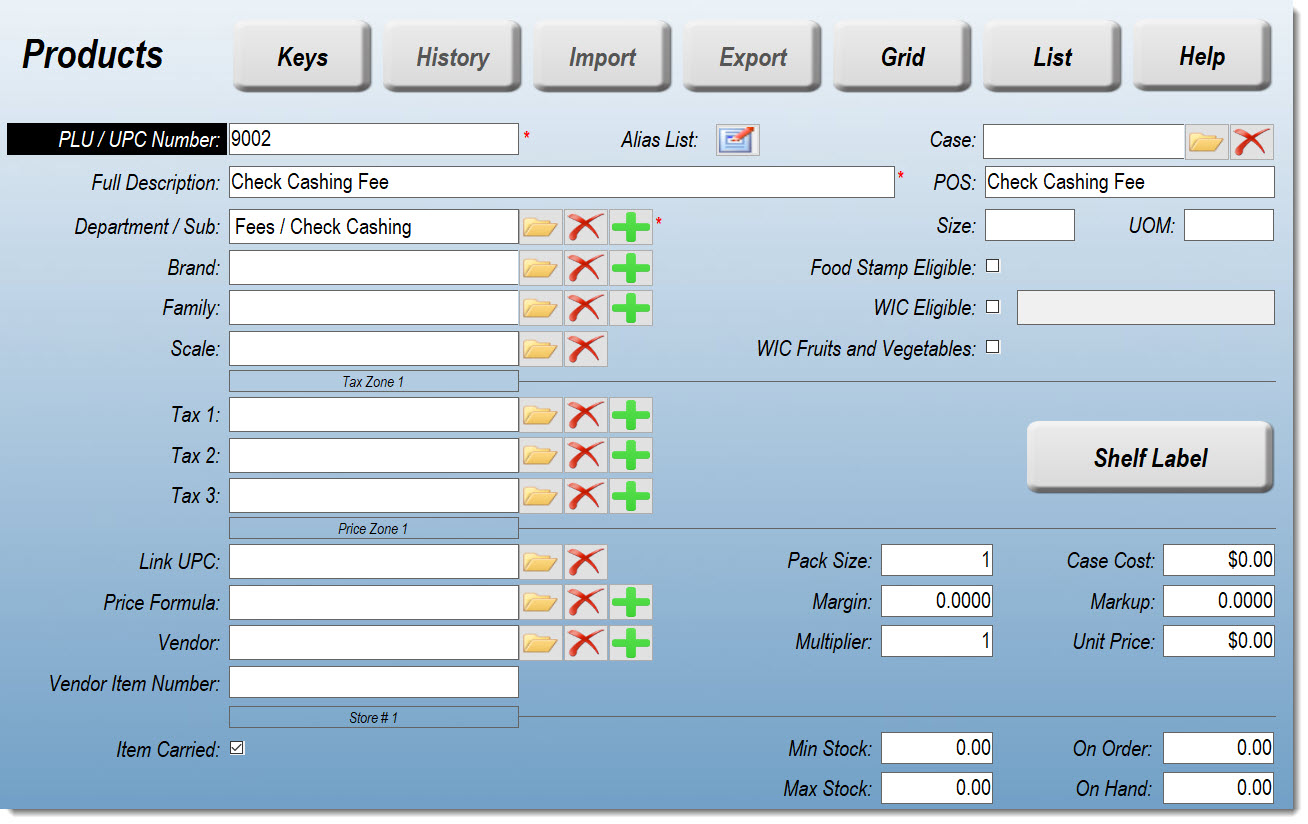
Step 2: Create a Check Cashing Fee Product
Navigate to the Products screen (Data > Inventory > Products) to create a new Product for your check cashing fee. Be sure to assign the Department/Subdepartment you created in Step 1 to this Product. There is no need to enter a price or cost.
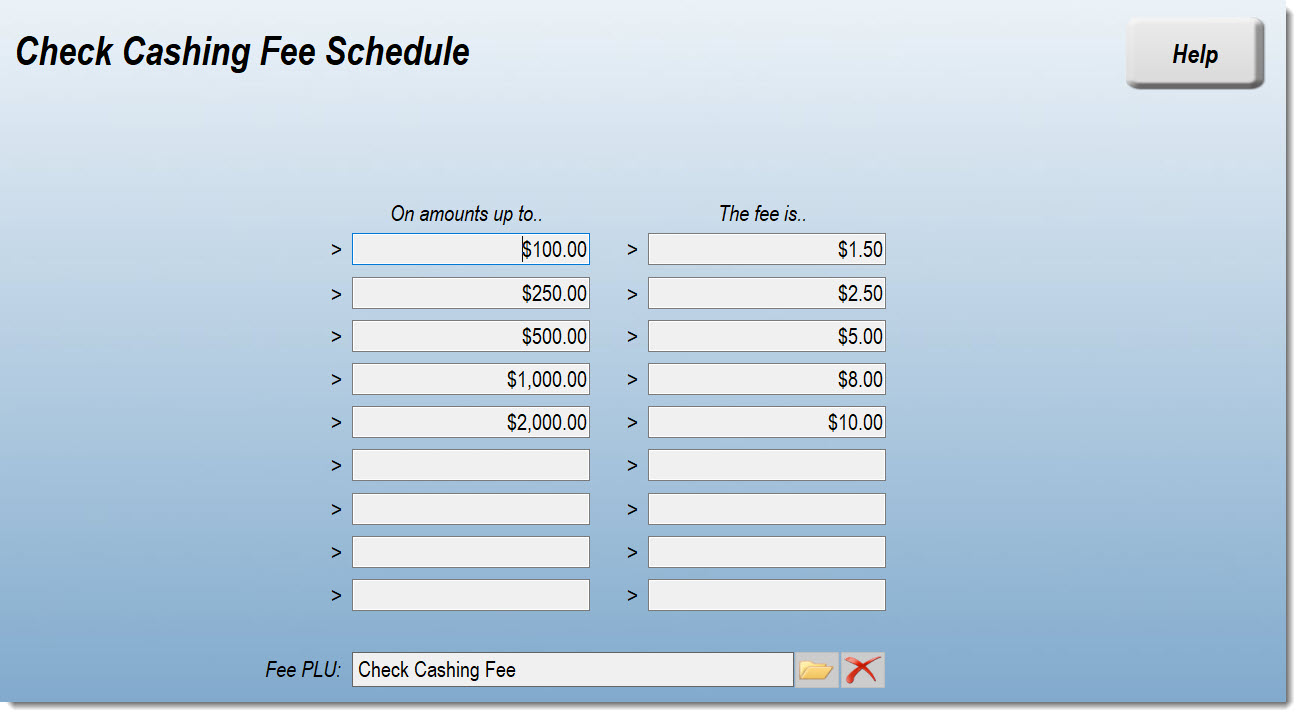
Step 3: Create a Check Cashing Fee Schedule
Navigate to the Check Cashing Fee Schedule screen (Setup > Store > Other > Fees & Services > Check Cashing) to create a schedule for your check cashing fee. You can charge different fees for varying amounts. Percentage fees are not permitted.
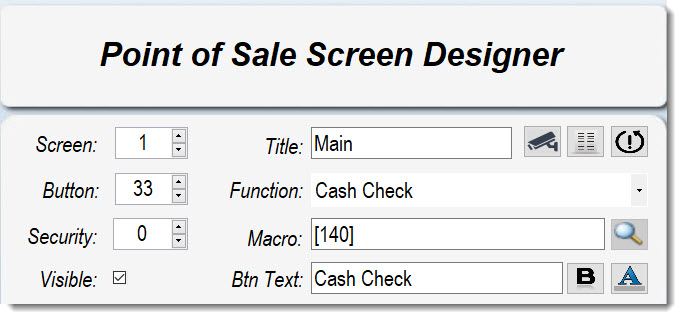
Step 4: Configure your POS Screen
Navigate to the Screen Designer (Setup > Store > Other > Screens).
Create a button (wherever you wish) using the Cash Check function.
This will add the function "[140]" to the Macro field of your new button.
Click the following link for help creating a screen button: Using the Screen Designer
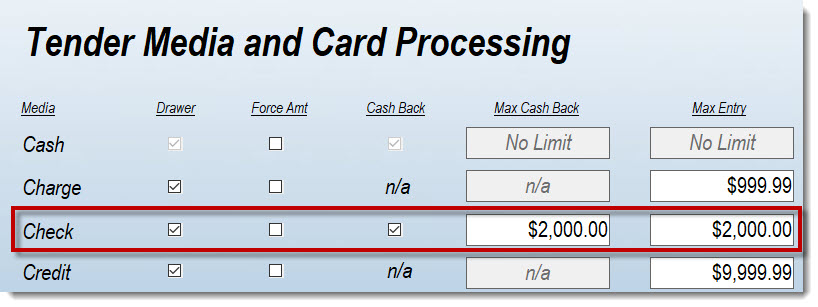
Step 5: Configure your Cash Back
Navigate to the Media screen (Setup > Store > Media).
Here you will need to make sure that your Check media has the Cash Back option checked, and that the Max Cash Back field reflects the largest check amount you're willing to cash.
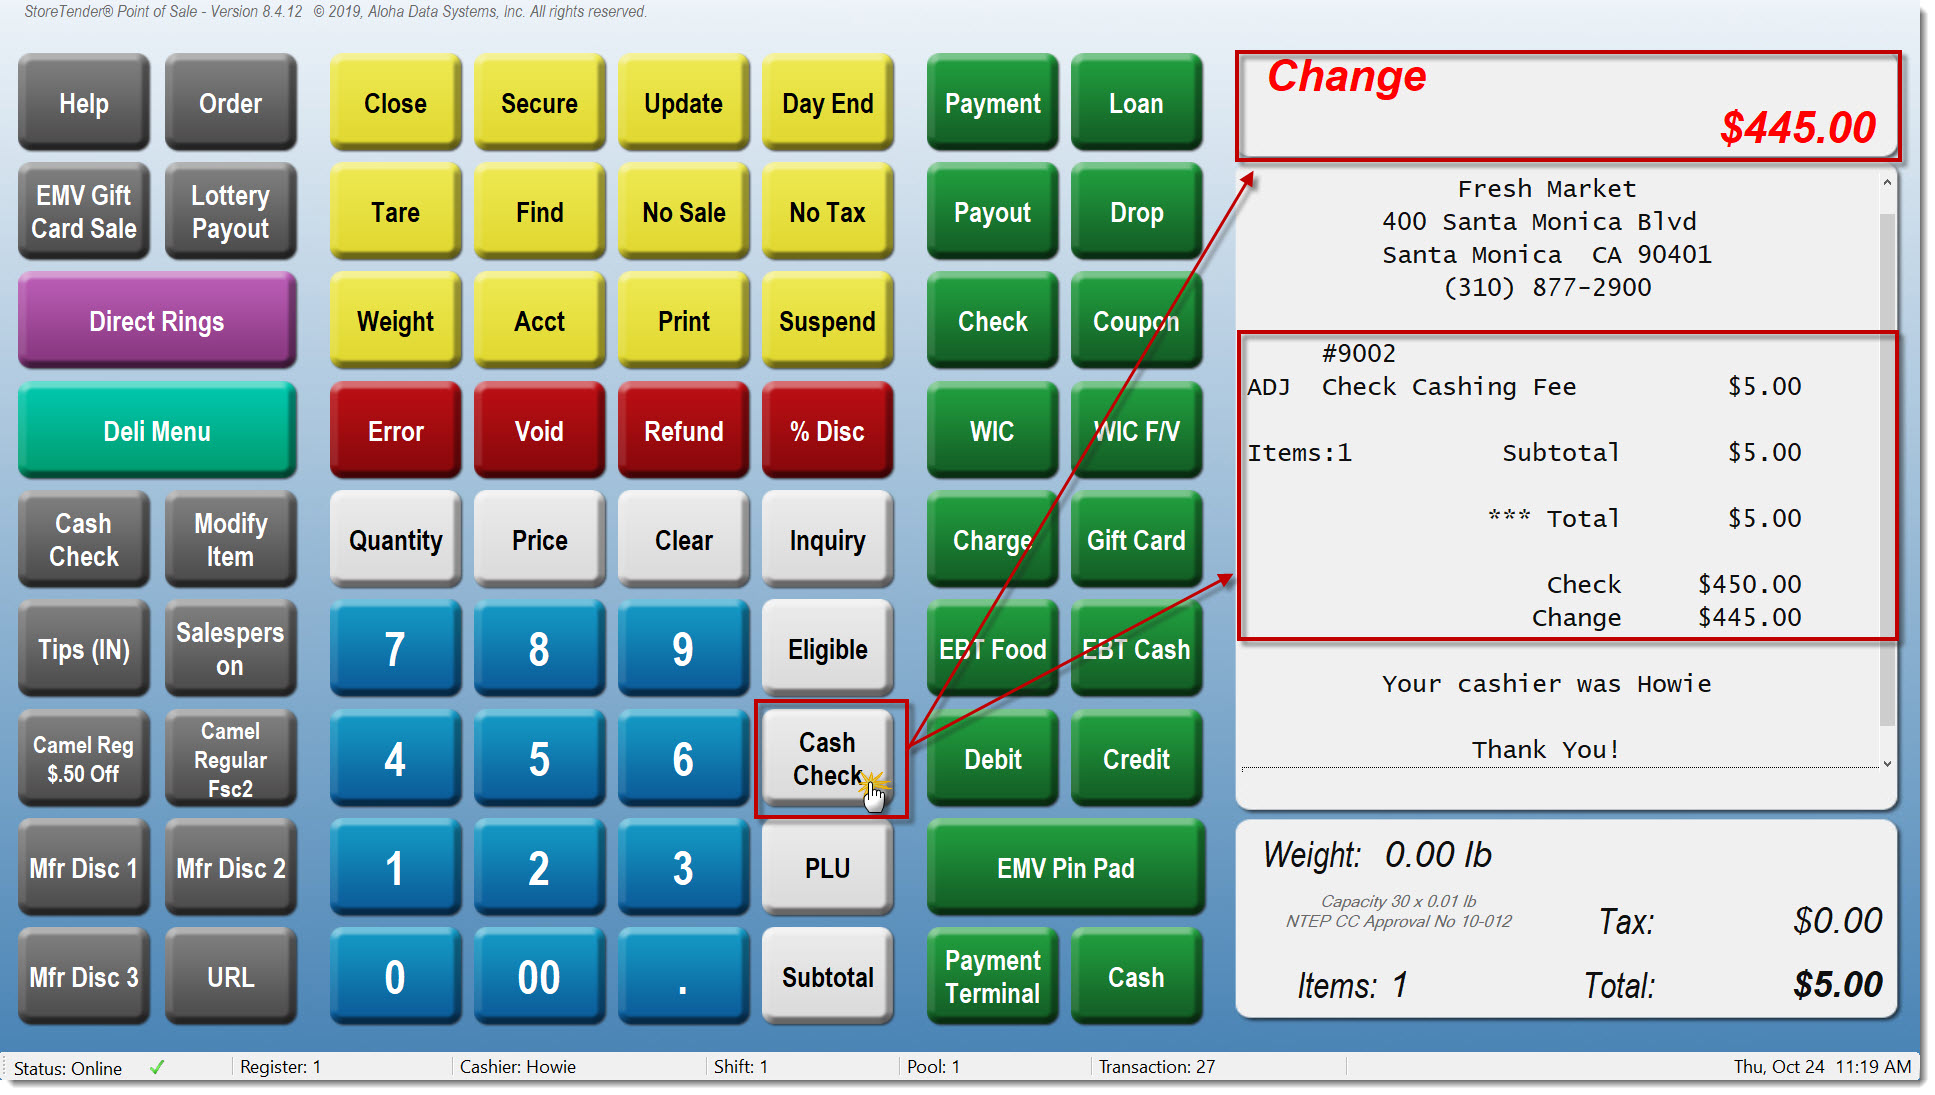
Step 6: Point of Sale Transaction
Now that you've completed the setup, SYNC your POS to accept the changes.
To cash a check, enter the amount of the check, followed by the Cash Check button you created in Step 4.
The POS will add the appropriate fee from the Check Cashing Fee Schedule, and conclude the transaction with the cash due back shown as Change due.
Step 7: Reports
You can get reports on fees collected in a few ways:
- POS Shift Reports (X-Report / Z-Report) will display department sales totals, including your Fees department.
- Reports > Sales > Department > By Department: Will provide department sales totals
- Reports > Sales > Department > By Subdepartment: Will provide both department and subdepartment sales totals
- Reports > Sales > Inventory: Will allow you to see detailed item sales including quantity sold, sales and profit. Filter by product or department.